
In the world of e-commerce, every email your customers receive is a chance to leave a mark. When they complete a purchase on your WooCommerce store, that confirmation email isn’t just a transaction—it’s an opportunity to strengthen your brand’s connection with them. Too often, though, the default WooCommerce email templates feel bland and forgettable, missing the personal touch that could elevate the experience.
Transaction emails, in particular, have the highest open rates among all email types in email marketing, making them a key touchpoint for engagement.
This is where customizing your WooCommerce emails can make all the difference. By adding your unique branding and voice, you can turn simple notifications into powerful, engaging communication that resonates with your customers. And the best part? You don’t need to be a coding whiz to do it. In this guide, we’ll show you how to easily personalize your WooCommerce emails using Virfice, a free, beginner-friendly plugin that takes your emails from basic to branded in just a few steps. Whether you’re just starting out or already growing a thriving e-commerce business, this tutorial will help you create emails that delight your customers and keep them coming back for more.
Why WooCommerce Emails Matter
WooCommerce sends a variety of transactional emails to keep your customers and you on the same page throughout the shopping experience. While these emails serve an essential function, they’re also an opportunity to strengthen your brand’s presence, build trust, and improve customer satisfaction.
Customizing these emails lets you move beyond the standard templates, offering a more polished, personalized touch that enhances the customer experience. A thoughtfully designed email—whether it’s an order confirmation, shipping update, or thank-you note—can help nurture loyalty, drive repeat business, and make your store stand out in a crowded marketplace.
Let’s dive into the key WooCommerce emails you can personalize to reflect your brand’s unique identity and business objectives:
- New Order: Alerts the store admin when a customer places an order.
- Canceled Order: Notifies the admin if an order is canceled.
- Failed Order: Informs the admin when a payment attempt fails.
- Order On-Hold: Sent when an order needs manual review or approval.
- Processing Order: Confirms payment and signals that the order is in progress.
- Completed Order: Notifies the customer when their order is fulfilled and shipped.
- Refunded Order: Informs the customer of a refund.
- Customer Invoice / Order Details: Provide a summary and payment instructions if needed.
- Customer Note: This delivers notes added to an order via the admin panel.
- Reset Password: Sent when a customer requests a password reset.
- New Account: Welcomes customers after they sign up on your site.
How to Customize WooCommerce Emails for Better Engagement
Out of the box, customizing WooCommerce emails can be tricky—editing layouts, adding logos, or tweaking designs often requires digging into PHP code or overriding template files. For most store owners, that’s a daunting task. Fortunately, Virfice – Email Template Customizer for WooCommerce simplifies the process, letting you revamp your emails without any coding knowledge. Here’s how to do it.
Step 1: Install and Activate Virfice
Start by logging into your WordPress dashboard. Navigate to Plugins > Add New, type “Virfice” into the search bar, and hit Enter.
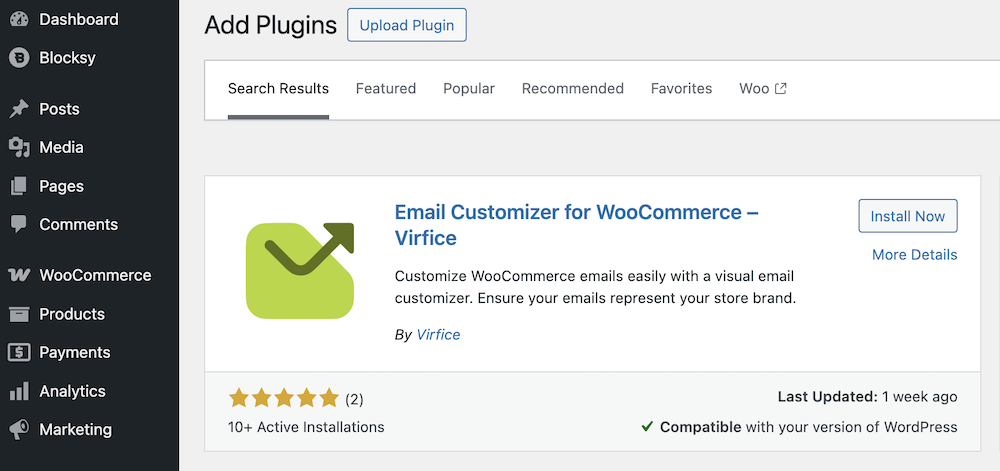
When Virfice – Email Template Customizer for WooCommerce appears, click Install Now, followed by Activate. After activation, you’ll see a welcome message on your dashboard, signaling that you’re ready to start personalizing your emails.
Step 2: Set Up Basic Email Settings
Before jumping into design, configure a few foundational settings to ensure your emails are professional and reliable. Go to Virfice > Settings > Email.
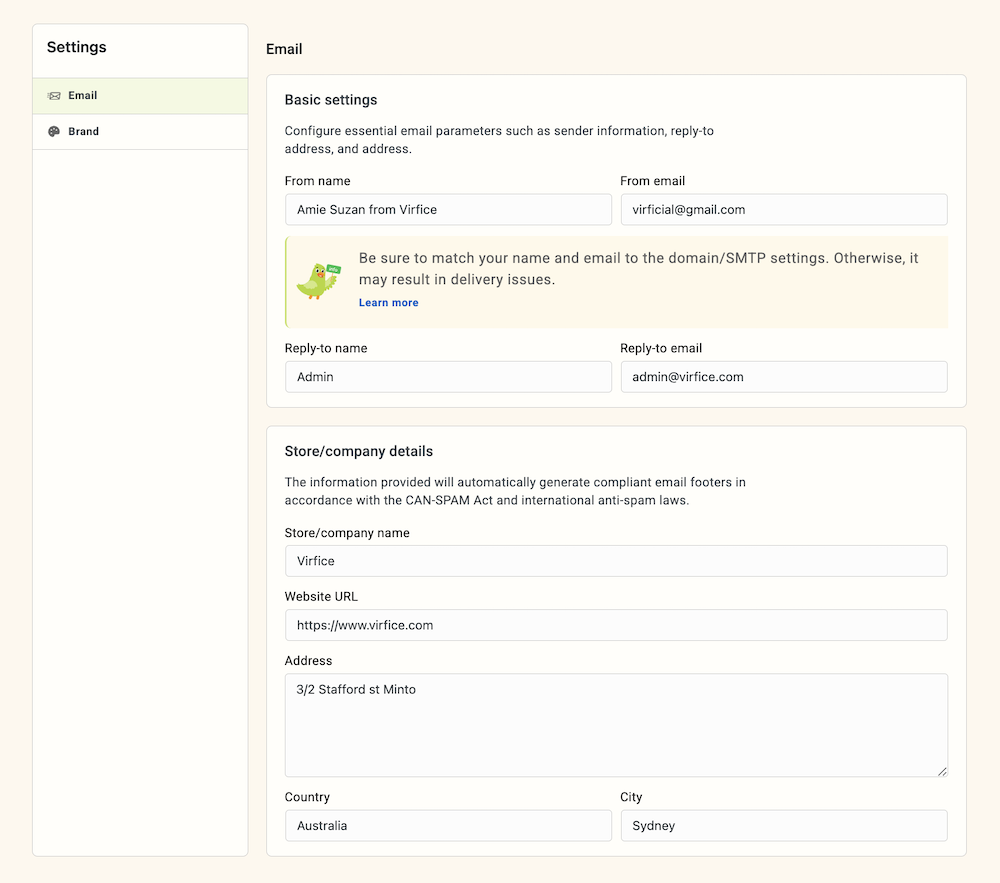
Here, you’ll find options for:
- From Name: Enter the sender name your customers will see, such as your store name (e.g., “Fresh Finds”) or a friendly variation (e.g., “Emily from Fresh Finds”).
- From Email: Input the email address your messages will come from, ideally one tied to your brand (e.g., “hello@yourstore.com”).
- Reply-To Name and Email: Specify where customer replies should go, ensuring they reach the right inbox.
Once you’ve filled these in, click Save at the top to lock in your settings. Now, your emails have a solid base to build on.
Step 3: Establish a Consistent Brand Look
With Virfice, you can apply global branding across all your WooCommerce emails in one go—no need to tweak each email individually. Navigate to Virfice > Settings > Brand, then click “Customize”.
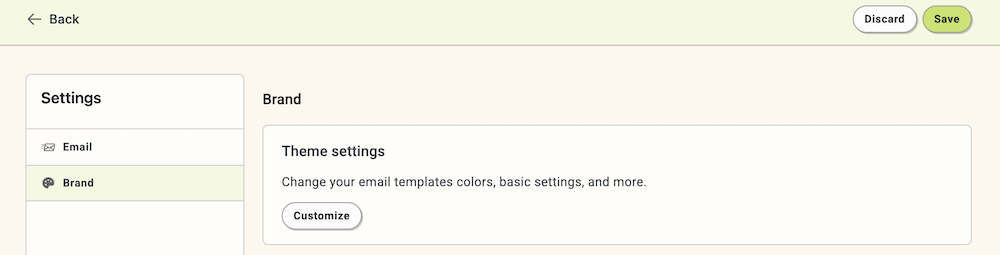
This opens the global branding editor, where you can:
- Upload a header logo.
- Set colors for the email background (inner and outer).
- Adjust the email width.
- Choose consistent colors for text and other elements.
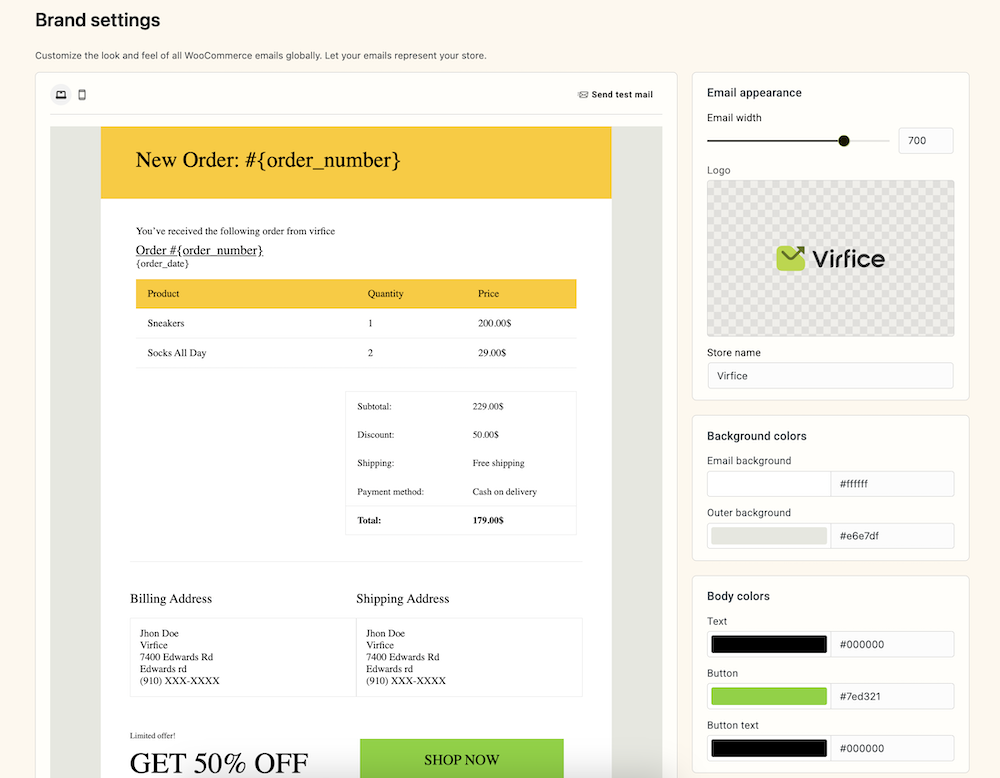
When you’re happy with your selections, hit Save. These changes will create a unified, professional look across every email your store sends.
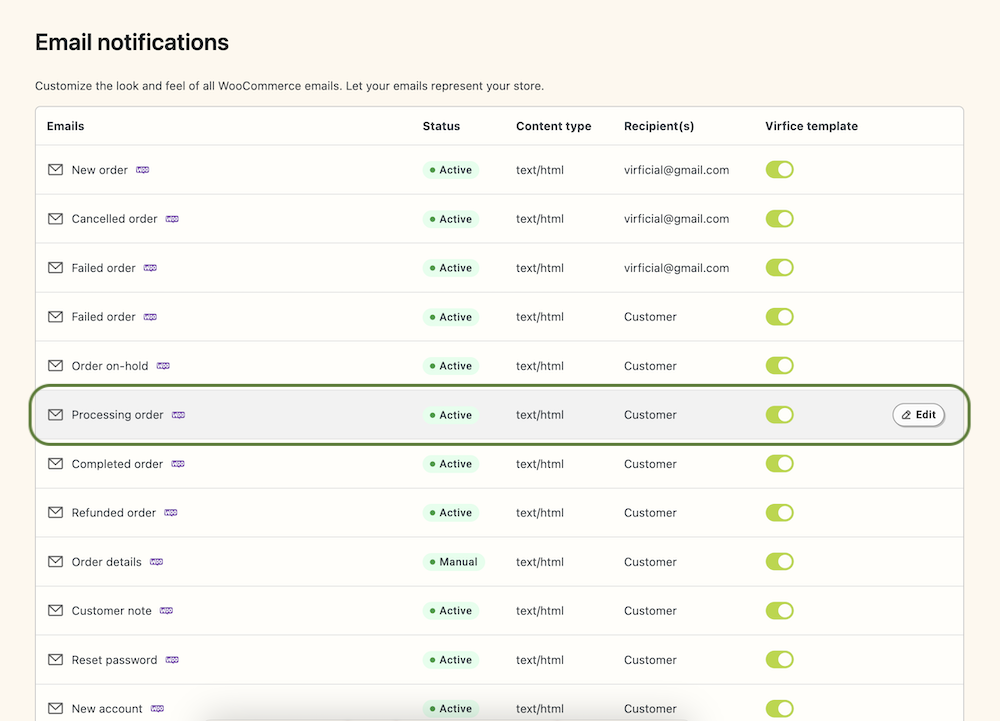
Step 4: Customize WooCommerce Emails One by One
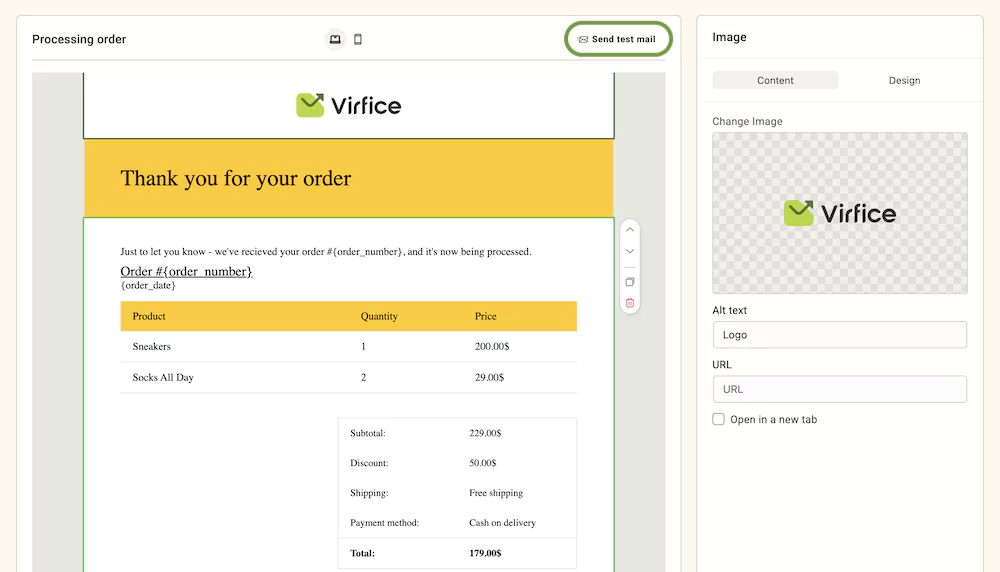
Now, it’s time to fine-tune specific emails. Head to Virfice > Emails, where you’ll see all 11 WooCommerce transactional emails. Let’s start with the Processing Order email as an example. Before editing, enable the Virfice template by toggling it on—this unlocks the drag-and-drop email builder.
In the editor, you’ll see a preview reflecting your global brand settings, along with default content for the email. Here’s how to make it your own:
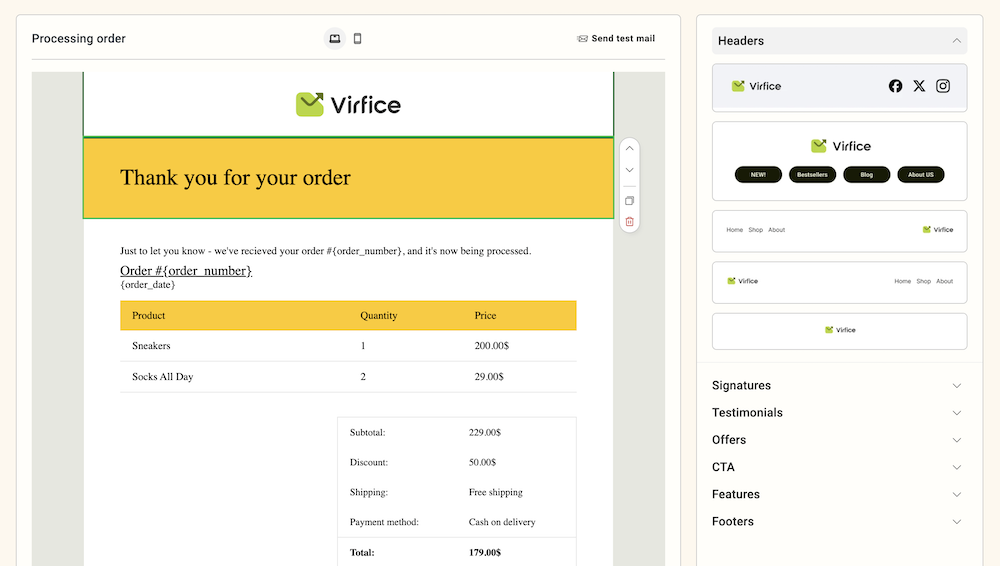
Add a Header to WooCommerce Emails
Boost brand recognition with a well-designed email header. In the Virfice Email Builder, click Ready Blocks > Header on the right panel, then pick a style that suits your vibe.
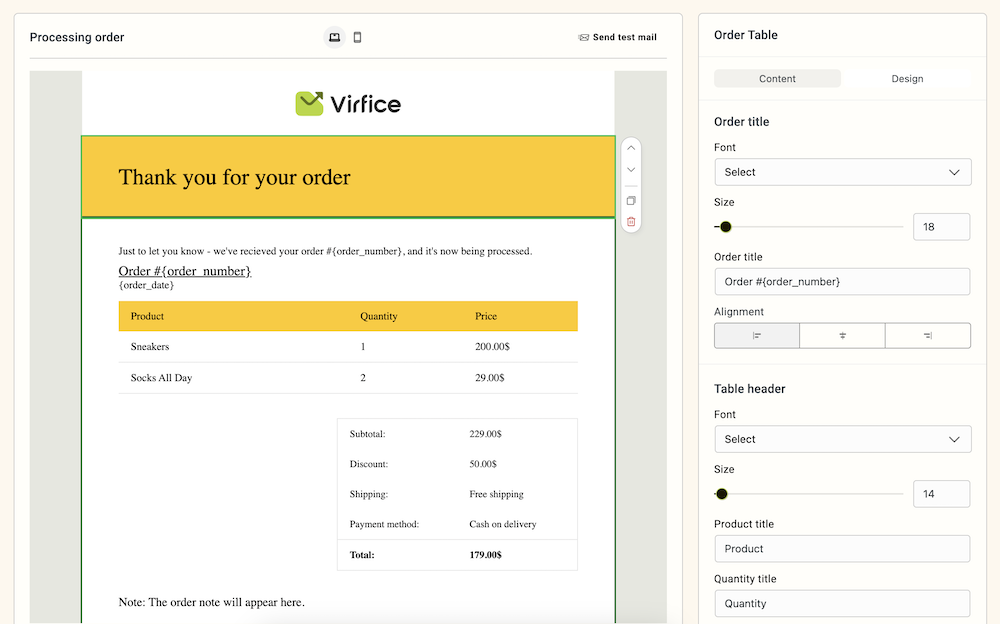
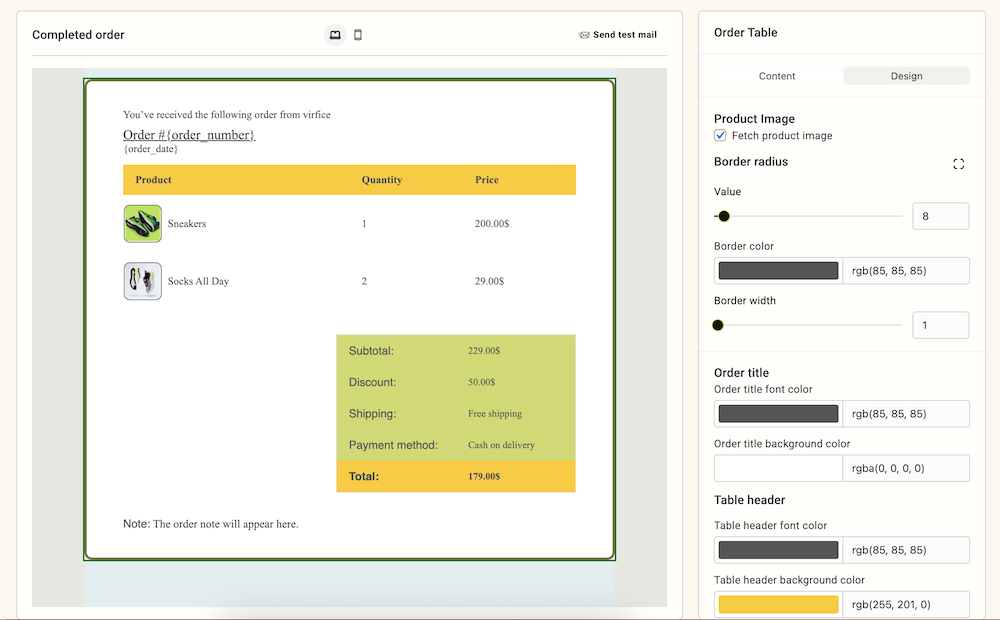
Style the Order Table
Make the order details pop. Select the order table in the editor, then tweak its content (e.g., headers, text) via the Content tab.
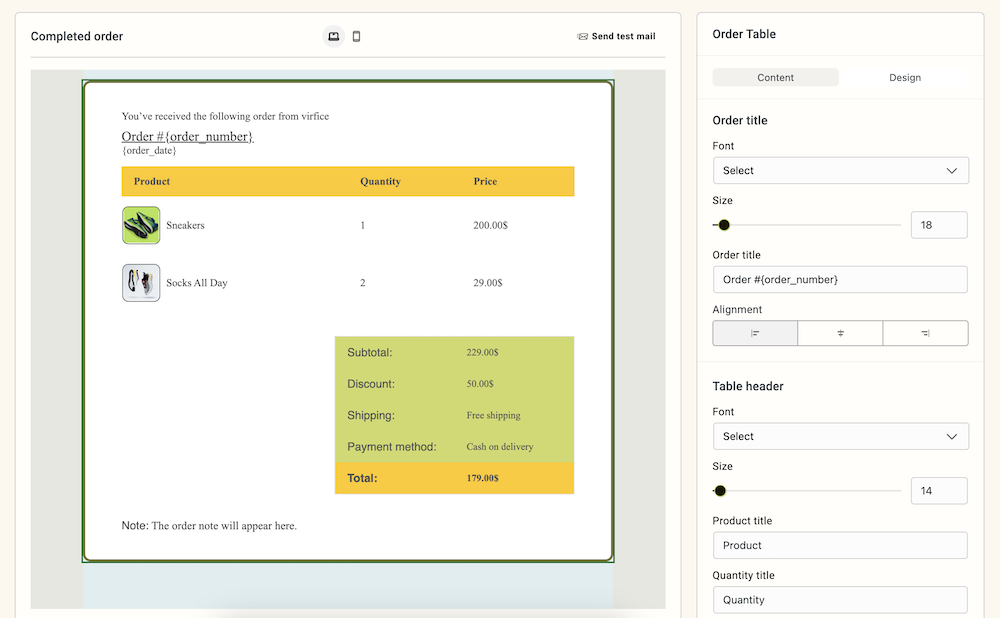
Switch to the Design tab to add product images or adjust colors for a standout look.
Include a Signature to WooCommerce Emails
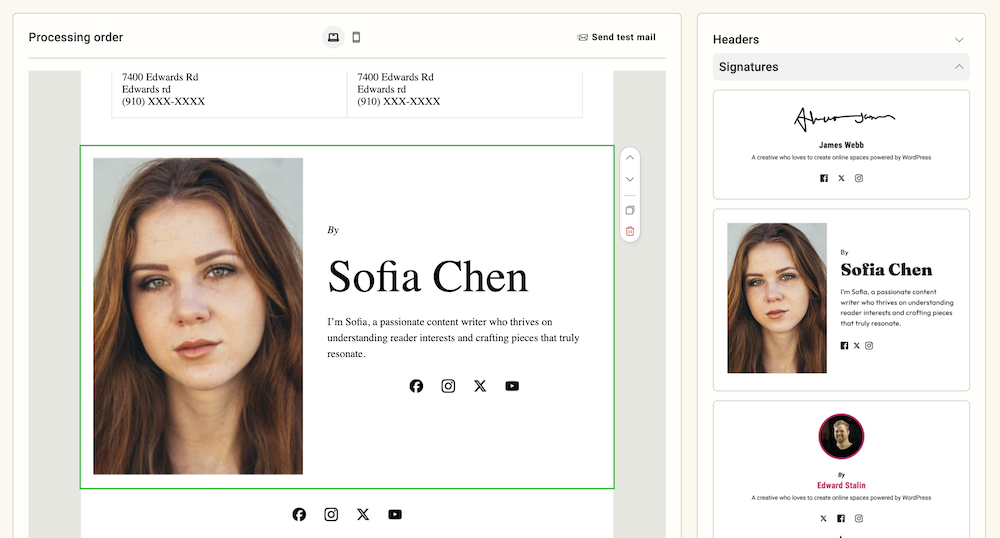
Add a personal touch with a signature. Go to Ready Blocks > Signatures, choose a template, and fill in your name, role, or contact info.
Add a Testimonial to WooCommerce Emails
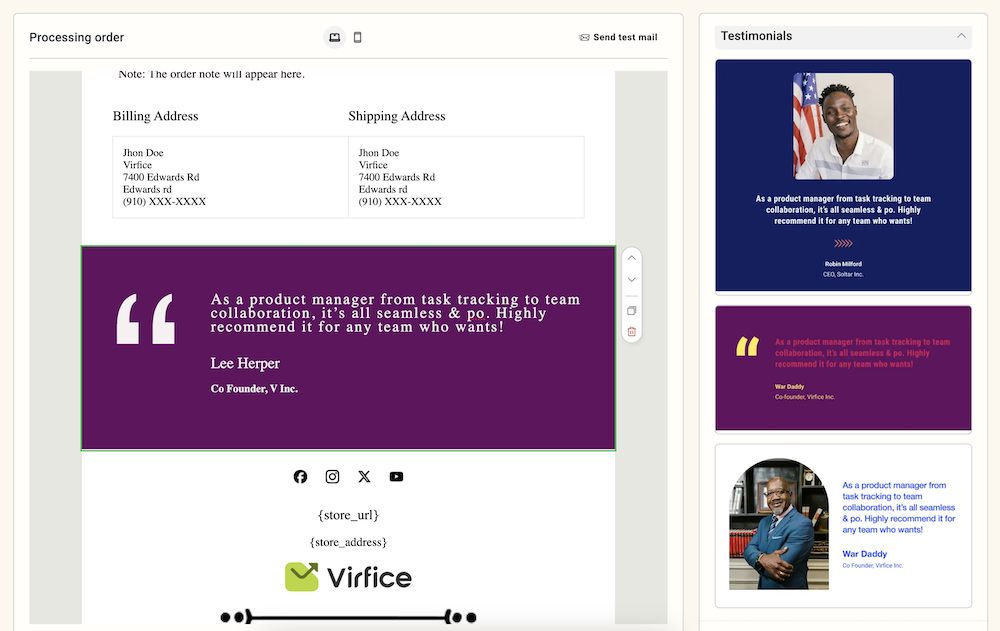
Build trust with customer feedback. Click Ready Blocks > Testimonials, select a layout, and insert a glowing review.
Add a Footer to WooCommerce Emails
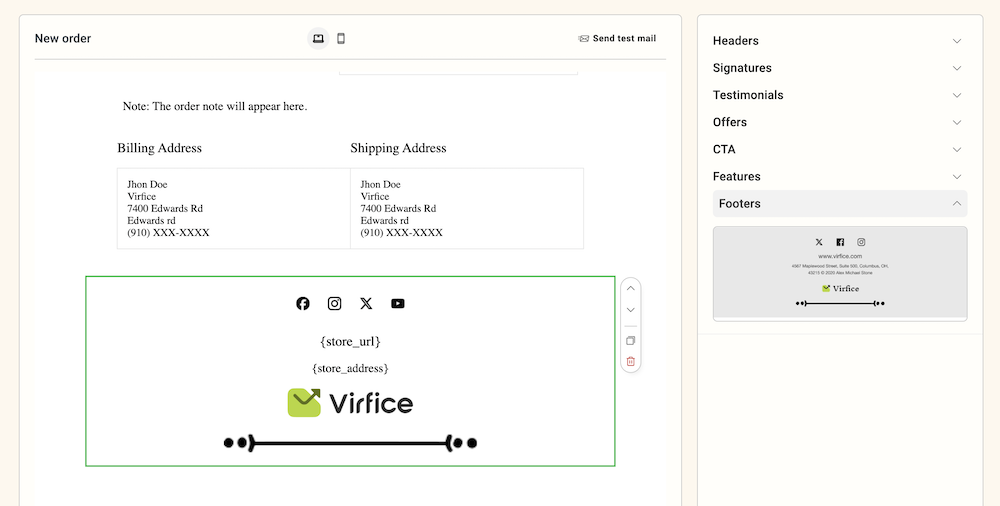
Wrap up professionally with a footer. Under Ready Blocks > Footers, pick a design that includes your contact details, legal info, or an unsubscribe link.
Step 5: Test Your Emails
Before going live, preview your work by sending a test email. While in the editor (either in Brand Settings or an individual email), click “Send Test Email” in the top-right corner.
Enter your email address (or multiple, separated by commas) in the popup, then click Send. Check your inbox to ensure everything looks perfect.
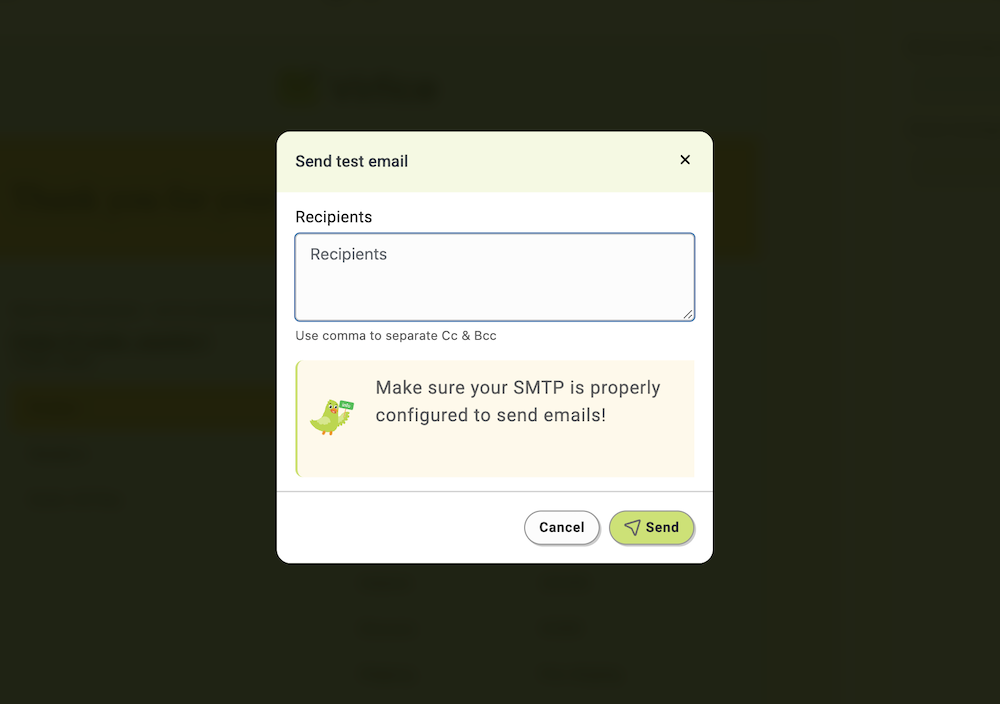
Note: If emails don’t arrive, double-check your SMTP settings in WordPress.
Customizing WooCommerce emails is easier and more accessible than you might think. With Virfice – Email Template Customizer for WooCommerce, you can effortlessly create stunning branded emails that connect with your customers. Whether it’s a personalized header or a custom footer, you have full control over every aspect of your communication.
Don’t settle for generic emails—take your customer interactions to new heights. Install Virfice today, start designing, and see how your emails can elevate your brand and drive lasting customer loyalty.